How to do Watercolor Designs on Fabric with Fabric Markers
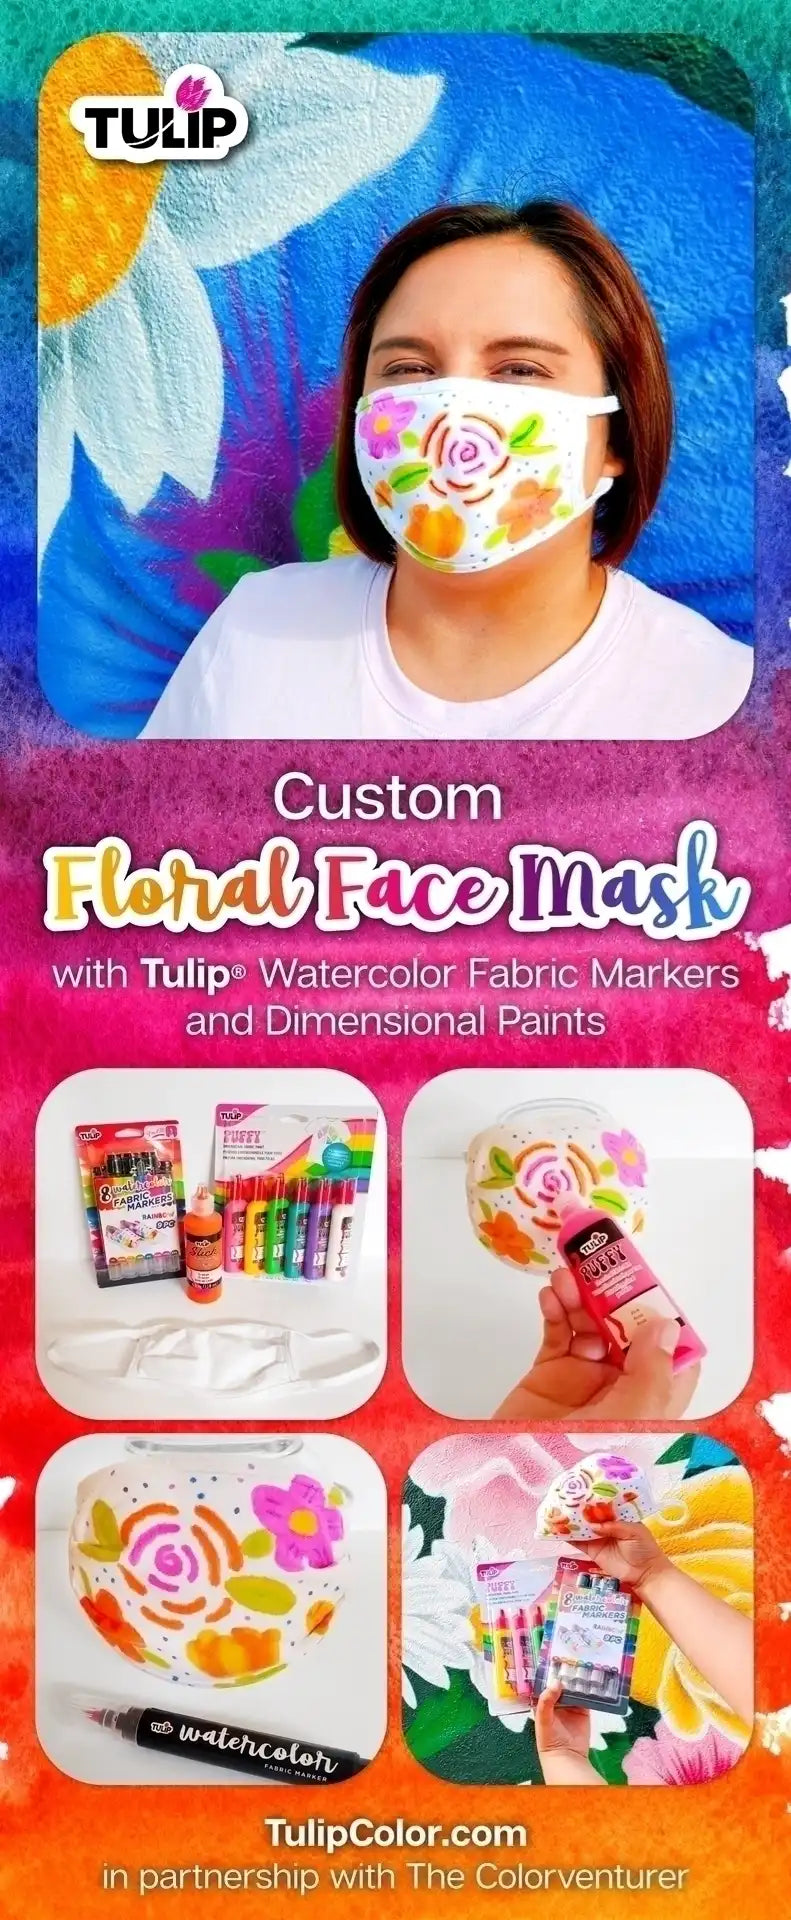
While you’re probably ready to head out for some fun adventures, you might still need your face mask for certain activities. The Colorventurer will show you how to easily decorate a simple white cotton face mask with a beautiful bouquet of color using Tulip Watercolor Fabric Markers and Puff Paint. Just a little bit of creativity will go a long way in staying safe in bright summery style while you’re out and about!
And to keep the watercolor fun going, we've added a few watercolor on fabric projects to try with Tulip Fabric Markers and Tie Dyes!
What you need:
- Tulip Watercolor Fabric Markers
- Tulip Puff Paint– desired colors
- White cotton face mask
- A circular container to secure your mask on for painting

This easy Watercolor Floral Face Mask project only requires a few supplies, and is ready to wear in no time! First make sure your mask has been washed and dried (without fabric softener).

Before getting started on decorating your face mask, it helps to secure it to a nice rounded object to fully stretch it out and help it remain stable as you decorate it. Here are The Colorventurer’s tips on how to create each flower shown:
Cabbage Rose: Using the fuchsia Fabric Marker (or color of choice), start by drawing a small swirl shape, then create a few curved lines around the swirl to expand the flower. Switch to another color to add dimension to the flower design with a few more concentric curved lines. With the green marker, draw leaves on either side of the cabbage rose. To add dimension to the leaves and to give it that watercolor effect, use the yellow marker on the edges of the leaves.
Daisy: Draw a yellow center with the yellow Fabric Marker, then make petals around it with the fuchsia or other desired marker color. Use the purple marker to draw thin lines onto the petals. Lastly, add some leaves to the flower with the green marker.
Cistus: Draw and fill in the flower's petals with the orange Fabric Marker. To create the dots in the center of the flower, simply tap the red and fuchsia markers around the center of the flower. Complete the flower with some leaves.
Tulip: With the yellow Fabric Marker, create the center of the tulip, then leaving a small gap between each section, draw the top and outside petals on both sides. Next, with the orange fabric marker, fill in the gaps. Add a stem and leaves with the green and yellow markers.
Snapdragon: Draw a stem with the green Fabric Marker, then with the yellow fabric marker, create a swirl at the top of the stem. To add some dimension to the flower, take the red marker and add some smaller swirls within the yellow—the color will blend out into the yellow of the snapdragon.

To make the flowers pop once the mask is dry, accent the designs with Dimensional Paints in either coordinating colors, or contrasting shades if you’re feeling extra bold! Let dry completely.

Now your pretty floral face mask is ready any time you need it while out and about!

What other watercolor crafts will you create with Tulip? Here’s a few more ideas for using Tulip Fabric Markers and Tie Dye to watercolor on fabrics:

Does your living room need a refresh? These pastel watercolor tassel pillows are the perfect accent for your couch! Start with plain pillowcases and use Tulip Fabric Markers and rubbing alcohol to create diffused watercolor stripes. It’s that easy to turn your drawn designs into watercolor on fabric! Glue on some fun trims and embellishments, and you have a quick and easy no-sew throw pillow!

This minimalist flower tote is a colorful and simple watercolor on fabric project to try! Use Tulip Fabric Markers to draw each flower’s stem—and get creative with it! Then, add your beautiful watercolor blooms with Tulip Watercolor Fabric Markers. Spray with rubbing alcohol to create dreamy watercolor effects! You just can’t get cuteness like this in stores!

Here’s another cool way to watercolor on fabric! Use Tulip Fabric Markers to draw the outline of a butterfly, then use the Tulip Watercolor Brushes to diffuse and blend the colors! Once dry, use Fabric Markers to add finishing details to your design. Now you’ve got a wonderful wearable watercolor work of art!

Fill your Tulip Watercolor Brushes with Tulip One-Step Tie Dye for a different watercolor on fabric experience! To create a fun floral pattern like this, simply brush on the dye and squeeze the barrel to control the flow, then rinse and repeat for each color. For more diffused designs, fill your brush with water and go over your tie-dyed patterns!

The Tulip Watercolor Brushes are also great for small watercolor on fabric projects, like making a watercolor tie-dye hat! You won’t have to worry about bunching and binding with rubber bands— just brush on the One-Step Tie Dye and free-hand your tie dye!
What else will you watercolor with Tulip? Show us your colorful creations and tag us on social media @TulipColorCrafts!


