


How to Make a Tie-Dye Picnic Blanket
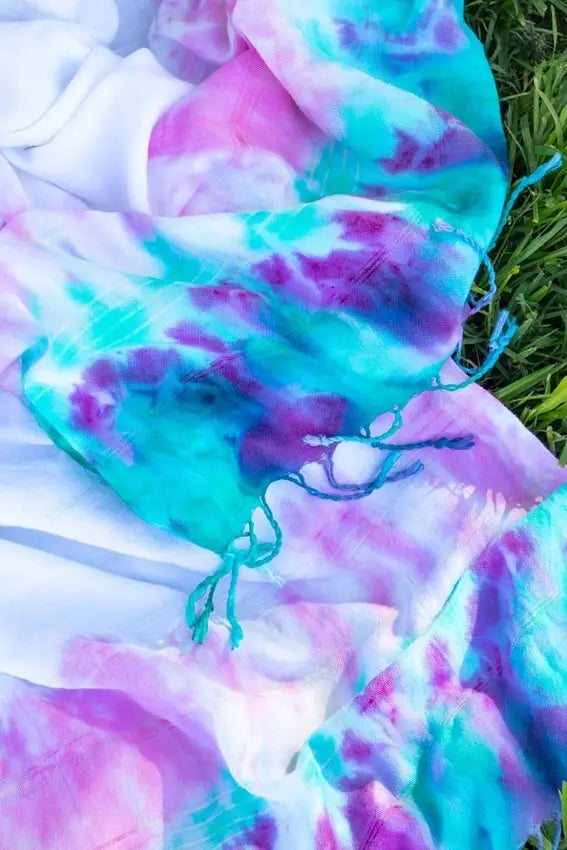
Summer is just around the corner and that means sunbaths, pool days, and backyard picnics! And nothing ties together a perfect picnic on a lazy, sunny afternoon quite like lounging on a bright, happy tie-dye blanket. Using a Tulip Two-Minute Tie-Dye Kit, Club Crafted shows us how to add the quintessential splash of summer color to all of our upcoming backyard adventures faster than ever before! Lying poolside has never felt so refreshing, with colors that rival sweet berries and juicy watermelon, you’ll adore this delicious summer accessory to brighten up your private oasis year-round!
What you need:
- Tulip Two-Minute Tie-Dye Kit
- A thin, white 100% cotton blanket or a Turkish towel
- A plastic cover to protect your workspace
- Microwave
- Oven mitts

First, wash your blanket and make sure it is completely saturated with water. Wring out the excess water, but make sure the material stays sufficiently damp so that way it won’t scorch later on in the microwave! Be sure to protect your work surface with a disposable plastic covering before getting started with your dyes.

Mix your dye! Fill the Tulip Two Minute Tie-Dye bottle to the fill line, tighten the lid so it is secure, and shake to mix until the dye is completely dissolved. Repeat with all the colors you wish to add to your blanket.

Along the folded edge of the blanket, starting on one side, wrap a rubber band around a third of the fabric a few inches down from the top of the fold. Wrap another one around the bound fabric about an inch above the first. Repeat this twice more with the remaining thirds of the blanket as shown.

Bind the rest of the blanket with two more rubber bands, several inches apart. This is just one way to do it, but feel free to get creative with how you tie your blanket!

Put on the gloves provided in the kit and apply the dye to the areas of your blanket you wish to add color to. Rotate the blanket as you add dye, applying the dye between the folds and to all sides. Leave white space between the different colors so they don’t mix and become muddy. Make sure to flip your blanket over and repeat this process on the other side until you achieve your desired look!

Immediately place your dyed blanket into the Two Minute Tie-Dye container. Make sure your blanket is still completely damp before placing it into the container. If any portion of your blanket has dried, mist with a spray bottle until damp again.

Adjust your blanket if needed to completely fit into the container and close tightly. Next, microwave it for the time recommended in the instructions based on the size of your project and microwave wattage. Wearing oven mitts, carefully take the container out of the microwave, and let it cool for 15 minutes with the lid still intact. Open the lid and let the blanket cool for an additional few minutes, until it is cool to the touch. Check out your product instructions for more detailed information!

Once your blanket is ready, carefully cut the rubber bands off to reveal your unique design!

Rinse and launder your blanket according to the kit instructions.

Be it a picnic, pool day, or an afternoon nap, your custom new creation is ready to be the perfect accessory for all of your summertime adventures!